The emergence of CDs in the market has changed the way ordinary people think about the possibilities of storing information on the computer. If handled carefully, the new media have become a worthy substitute for the cumbersome floppy disks, often failing the user a sudden unreadability and sensitivity to magnetic interference.
But it took a little more time, and disks were displaced to the side of the flash drives, managed to offer users a good capacity and record-small size. Hoards of drives, purchased at minimal cost for recording movies, music, and software, at one point were unclaimed. And others were inspired by the shiny surface to design a solar panel. Building a solar panel is not as difficult as it seems at first glance.
Precautions
Contents
We recommend that you wear personal protective equipment while working. Such as safety glasses and gloves.
How does It work?
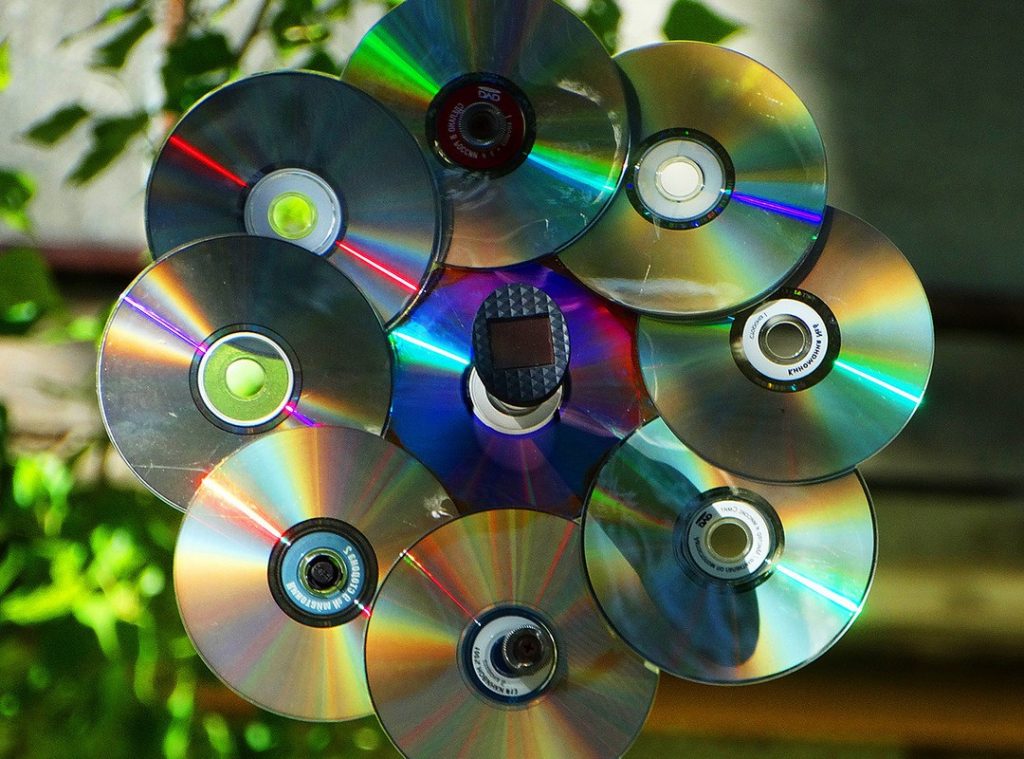
Structurally, the finished model can be represented as a base on which reflective surface elements – CDs – are sequentially fixed. Their number is calculated depending on your goals to get a certain amount of electrical energy from the panel. For small consumers in the form of electronic clocks, radios, or lamps, 15 disks will be enough.
Accordingly, to power, a larger energy-dependent device will be possible from a larger number of reflective elements. But here there is another problem – the size of the battery, the installation of which can be difficult because of the significant weight and height.
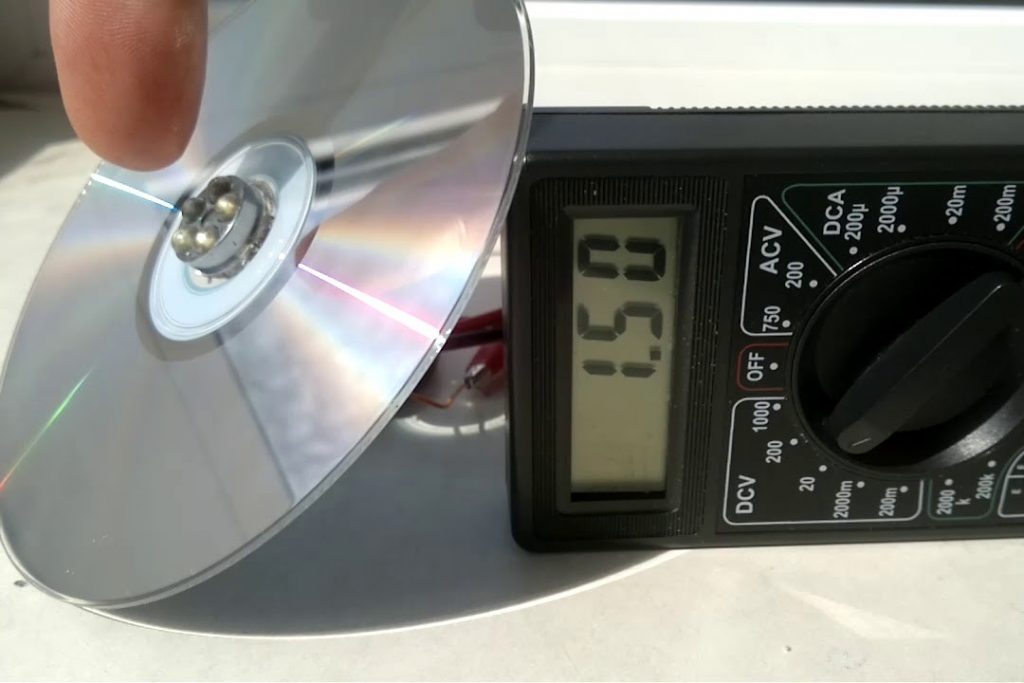
Since the disks are not adapted to capture and process solar energy, the solar cell output on the CDs is relatively low – about 2.5 V output voltage. The solution to this problem is only one – the rejection of alternative reflectors in favor of classic solar panels from a proven manufacturer.
If you are pursuing an introductory purpose and are more interested in the assembly process than in the application of the finished product, try to increase the number of disks to 21-27 pieces. It will not be difficult to find a suitable place for such a battery, and its efficiency will be enough for simple experiments and practical training in the use of alternative energy sources.
Tools and Materials
To assemble a solar battery from CDs, you will need:
- Soldering irons with a thin rod;
- Several discs for the solar panel;
- Silicone sealant for gluing;
- Double-sided adhesive tape;
- Soldering supplies;
- Copper tire;
- Fasteners and a drill to drill the holes;
- Plywood or plexiglass as a substrate;
- Schottky diodes.
Pros and Cons of CD Solar Panels
Main advantages and disadvantages of CD solar panels
Pros:
- Solar panels produce no pollution or greenhouse gases;
- The not expensive cost of parts;
- Can be assembled by yourself;
- At the time of assembly, you can get practical experience and a general understanding of how solar panels work.
Cons:
- Solar energy generation by a homemade CD installation is not great;
- It is short-lived compared to a conventional panel;
- They may be less efficient in cloudy or shaded conditions.
How to Make a Solar Panel With CD?
Before you start, it is recommended to draw a diagram of the solar battery of CDs. Its preparation will take a little time, but the result will fully justify this slight delay. First, the scheme is the basis for all calculations of the future operating parameters of the panel. Secondly, you will be able to choose the best solution for the location of the drives and their connection – in series or parallel, depending on the place in the design.
Also, you can not forget about the polarity of the connections to get a workable system at the output. And if the power design is relatively large, the scheme should include a protective device RCD trip. Thanks to it you will be able to avoid overheating the panel and its combustion due to the intense heat exposure.
The general layout of the CD battery assembly is as follows:
- A base of Plexiglas or plywood is prepared. To increase the output and reduce the loss of light, it is recommended to cover the material with a durable dark cloth. The corners of the frame are pre-drilled for fasteners.
- A soft substrate is placed on the base. This can be thick cardboard, fiberboard, or a rubber sheet.
- Disks are placed on the surface of the base working side up, consistently fixing them with double-sided adhesive tape.
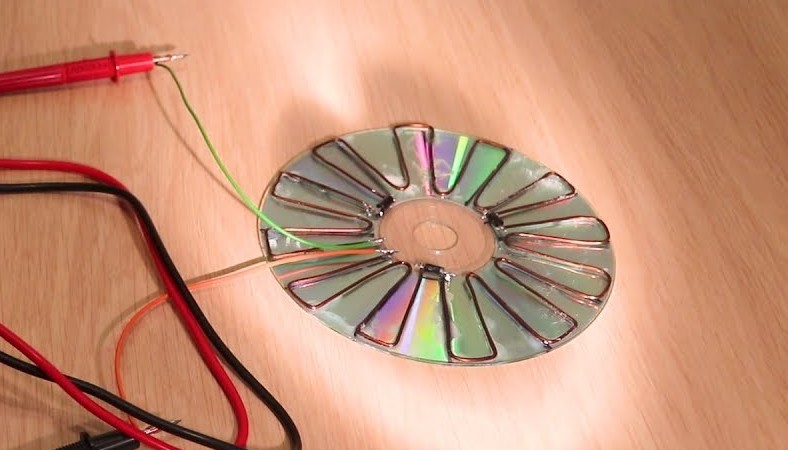
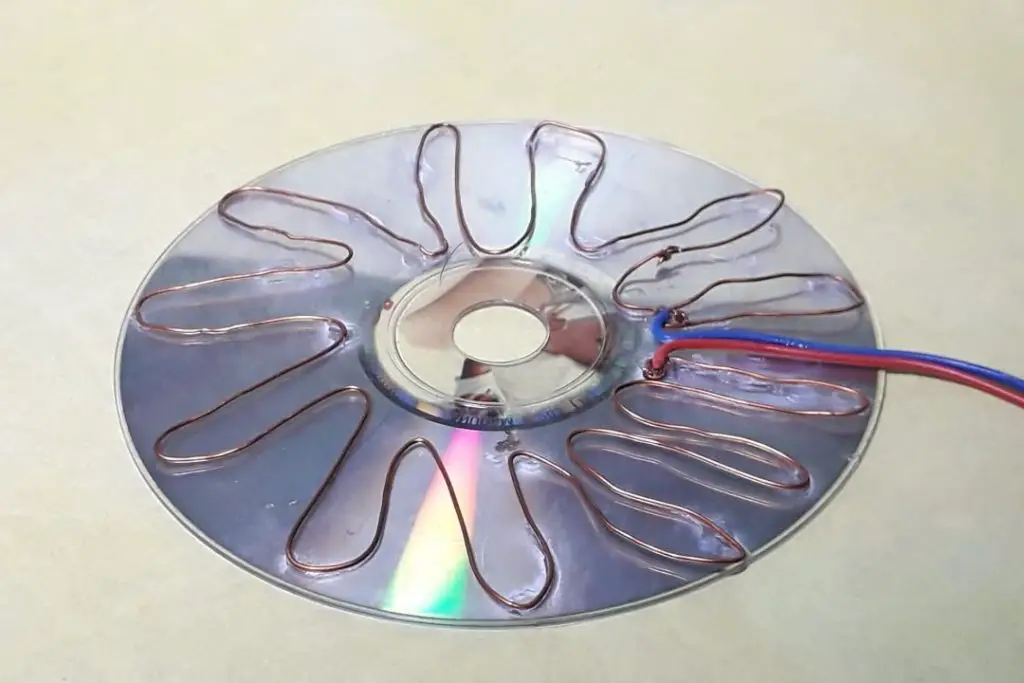
- Connect the elements by placing the solder outputs on the back side of the discs. The connecting connector is connected to the Schottky diodes.
- Lay a transparent sheet of glass or durable plastic on top of the finished reflective panel.
- The entire structure is sealed, taking into account possible modifications to the panel, the need for repair, and periodic maintenance. Before the final stage of assembly, it is worth once again checking all fasteners and testing the device for performance.
- The front surface of the substrate should be coated with several coats of varnish.
Recommendations
Perform all work on a level surface, such as a small table that can be approached from either side;
All discs must be perfectly uniform, with no visible scratches, cracks, or chips. Each defect reduces the efficiency of the device and calls into question the durability of the panel.
Sealing the joints of the substrate should be done before the discs are laid and soldered. This solution will provide access to all corners and allow you to securely seal every inch of the joint. The sealant must be completely dry before further work.
Fastening the elements of the base and side parts is better with internal or external metal corners. Due to the fasteners, the structure will not collapse under the influence of its own weight and will retain its shape.
Before applying the transparent top part, discs are thoroughly wiped to remove sealant droplets, dust, and small particles from them.
The soldering iron for joining discs should have medium power. Excessive exposure to the temperature at the same time as the pressure can cause damage to the fragile surface.
To exclude accidental errors and make the design work right the first time, it is better to buy everything you need right before assembly, rather than taking the right parts from other designs. The newer the components, the longer the product will last without the need for repair or tedious rework.
Frequently Asked Questions
Answers to frequently asked questions for those who want to create solar panels from CDs
Can I make solar panels myself?
It is possible to make solar panels yourself, but it is not recommended unless you are experienced in solar panel installation and maintenance. Solar panels require careful handling and regular maintenance in order to function properly, and it is best to leave the installation and upkeep of solar panels to professionals.
Why CDs is used in a DIY solar cell?
There are many reasons why CDs are used in solar cells, but one of the most important reasons is that CDs are excellent reflectors of sunlight. This means that they can help to increase the amount of sunlight that is reflected back into the solar cell, which can help to increase the efficiency of the solar cell.
Are solar panels cheap?
This is a difficult question to answer because it depends on a number of factors, including the size of the solar panel system, the location, and the type of solar panels. In general, solar panels are becoming increasingly affordable as technology improves and more companies enter the market.
Conclusion
If you are looking for an inexpensive way to get started with solar power, then you might want to consider making your own solar panel with CD. It is actually not that difficult to do and you can find all the materials you need at your local hardware store. The most important part of making your own solar panel is to make sure that the solar cells are facing the right way. If they are not, then the panel will not work as efficiently as it could.
It is important to understand that homemade solar panels made from CDs are significantly inferior to conventional panels in terms of the amount of energy generated.