A finish nailer, also known as a finishing gun, is a tool used for installing trim and other wood products. A finish nailer shoots narrow-head nails with a very small head. These nails are used to hold the wood piece in place after the installation of the wood. The nails are only visible on the sides of the wood or when looking at the piece from the end.
Finishing nails are used for building, construction, and other woodworking purposes. They are smaller in diameter than common nails. Finish nails are also called brads, wire nails, or gimlet nails. They are available in various sizes and shapes.
A Step-by-Step Guide on How to Use a Finish Nailer
Contents

Among finish nailer uses are fastening a trim, molding, and a finishing piece of wood or a panel. This tool is useful when you want to fix some loose boards in your house or in any area. Using a power finish nailer will cut down your time, and it will give you an accurate construction in a short period of time.
- Step 1: Check if the air pressure is correct. If the pressure is low, the nails will not be driven into the wood, and if the pressure is too high, the nails will cause too much damage to the wood. You need to use the right amount of pressure in driving the nails.
- Step 2: Check if there are nails missing in the magazine. If there are some missing nails, you will need to reload them.
- Step 3: Examine the wood to make sure if the surface is clean. If there is any dirt or the wood is not flat, then you should clean it first.
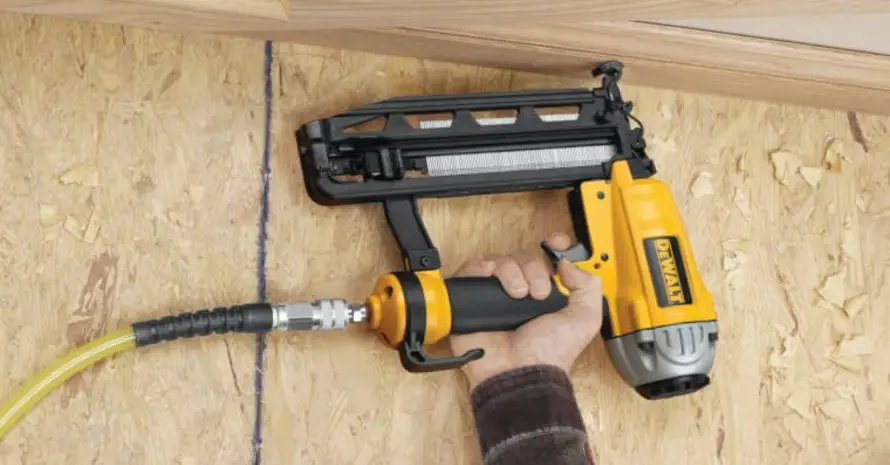
- Step 4: Hold the nailer in the right position. You need to hold the push nailer with the nose pointed to the wood and pull the trigger. Make sure that you should not press the nose against the wood so that it will not cause too much damage to the wood.
- Step 5: Use the right amount of nails. You can either use a single finishing nail or two nails. A single nail can be used if it is a small piece of wood, and if there is a need to use two nails, you should place one nail on each side of the wood.
- Step 6: Use the right speed when you are using the nailer. If you use the nailer too fast, it will cause too much damage to the wood, and you will get a bad result. The best way to avoid this problem is to hold the nailer firmly and to use it slowly.
- Step 7: Hold the nailer perfectly. You need to hold the nailer from the back and hold it firmly. You should not hold the nailer too tight because it will cause too much damage to the wood. You can hold the nailer with one hand, but you need to make sure to hold it firmly.
- Step 8: Fire the nailer. Make sure that you should fire the nailer when it is pressed against the wood. The nailer will fire the nail into the wood, and you can hear a clicking sound.
That’s all. The steps may seem complicated, but once you practice them, you will not have any problem using the tool. If you need to know how to use a brad nailer, I recommend you read my article about brad nailers.
How to Use a Finish Nailer – 5 Common Problems and Solutions
Many of us, professional or novice, have had problems with our finish nailers. Whether you have had repeated jams, misfiring, or they just don’t work, here’s some info to help you.
If you have never used a finish nailer before, it will be wise to take time to get familiar with this tool before you begin to work. Here are some common problems that you might run into and how to deal with them.
Problem #1: Air leaks.
Solution: Check the air filter. If the filter is clogged, replace it with a new one. If there isn’t one, take the tool apart and clean it.
Problem #2: The nailer jams and does, not fire, or the trigger will not release.
Solution: Inspect the magazine and make sure it is fully loaded.
Problem #3: It won’t fire.
Solution: Make sure the nailer is working. If the nailer is jammed, remove the jam. If it is not jammed, check the fuse.
Problem #4: The nailer is hard to use.
Solution: Practice on scrap wood. Use a brad nailer if you can until you are comfortable with the finished nailer.
Problem #5: Nail strikes the surface of the workpiece instead of penetrating into the wood.
Solution: Start with clean work surfaces. Dirt, as well as the dust from sanding, prevent the nail from sinking into the wood.
Pneumatic Finish Nailer VS Cordless Nailer
Although both pneumatic and cordless nailers are used for nailing, there are some differences between them. The first difference between them is the power source. Pneumatic nailers are powered by an air compressor, while cordless nailers are powered by batteries.
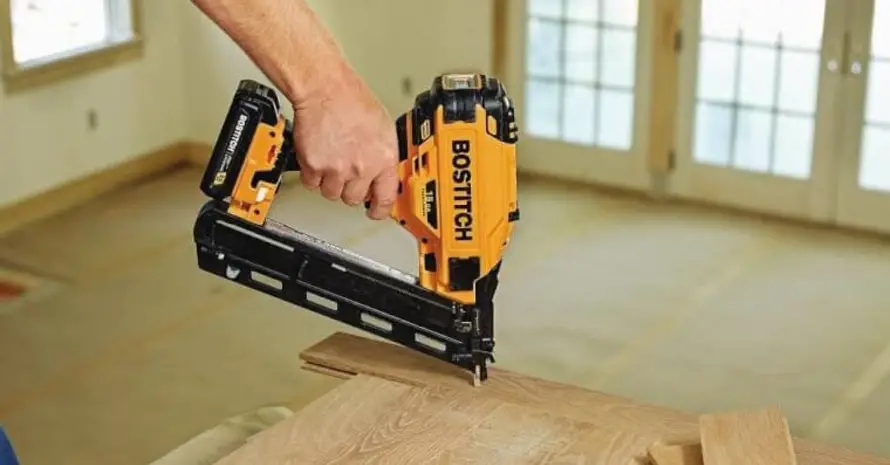
The cordless nailer is battery-powered. It is a fast and powerful tool, but it has some downsides. Its weight is very heavy, and the battery is the main problem. It can run up to a maximum of 2 hours with a full charge.
A pneumatic nailer is also a cordless tool. Operated by air finish nailer is lightweight and powerful. Its power is enough to drive any kind of nail, and its air tank can store a good amount of air. Its air hose is flexible, and it can be extended at any length.
The tool consists of a handle and a barrel that has a magazine that contains a number of nails (18 gauge, 21 gauge, and 23 gauge). It is fired when the trigger is pulled. The tool has an air cylinder attached to the bottom of the barrel. The cylinder is connected to the air compressor.
As the trigger is pulled, the air cylinder pushes the plunger, pushing the nail out from the barrel. The nails are held against the workpiece by a spring. When the trigger is released, the nail is released, and the spring pulls it into the surface of the workpiece. Once the nail is fired, the nailer is automatically reloaded with another nail.
Advantages and Disadvantages of Finishing Nail Gun
There are many advantages of using a finish nailer:
The tool is portable, lightweight, very effective, and easy to use.
It works quickly and easily.
It requires very little physical effort.
The tool is very efficient.
It is used for a range of purposes.
It saves time and money.
There are also some disadvantages:
The tool is very expensive.
It is not compatible with every material.
The Bottom Line
A finishing nailer is a kind of power-driven fastener tool that is used to install a thin layer of veneer, paneling, or laminate onto the base wood. It is a must-have tool for a woodworker, carpenters, and many other industries.